
Packet: Using Outpost Packet Message Manager with a PK-88 TNC
Ever since I got back into packet radio, I’ve been looking for a suitable software application that would work with my PK-88 and Windows 7. After trying to figure out a way to get WinPack to work in Windows 7 (which it does not) and then settling on Tera Term, I found Outpost Packet Message Manager.
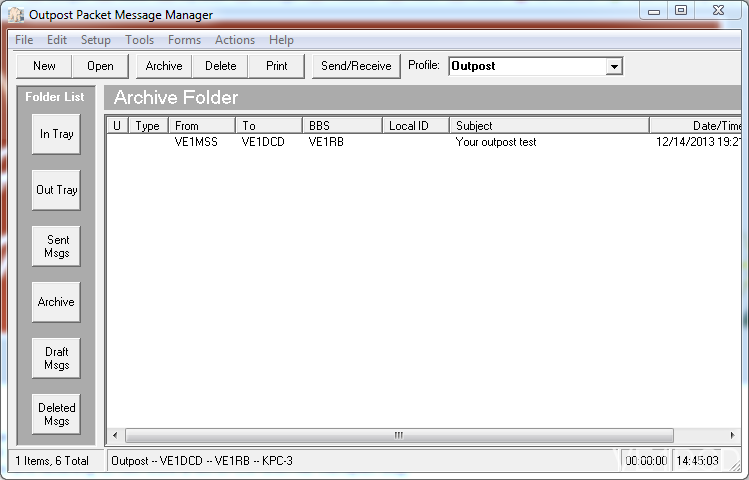
What I like the most about Outpost is that it works a lot like email. It’s a familiar interface and is easy to learn. Some of the terminology is a bit different but that’s minor. For example, the Inbox is called In Tray and the folder that stores messages waiting to be sent is called Out Tray. See below for a picture of the main screen. I’ve included a message that I archived so you can see the how it looks.
Although the software is not technically made to work with a PK-88 TNC, I found that you could easily get it going by using the build in settings for the Kantronics KPC3. Luckily it uses the same command set and works pretty much identical.
One thing to note, is that this software is mainly used to connect to, and send messages through, a local BBS system. We currently have one local BBS that is accessible through our club’s digipeater (or direct for some). As you’ll see later on, this is VE1RB.
It wasn’t difficult to configure the application I decided to provide step by step instructions in case it may benefit others.
- Download Outpost from here.
- Install the software
- Open the program: All Programs > Outpost > Outpost PMM. It also installs other applications but this is the one we want for now.
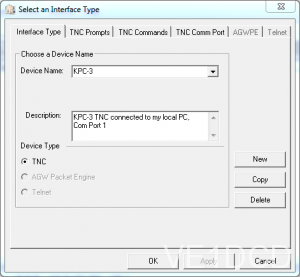
- Once the main screen is open (see above). Click the Setup menu and select TNC.
- Now we need to define the settings to connect to the TNC. In the choose a device name, click the drop down, then select KPC-3 and ensure that the device type is set to TNC.
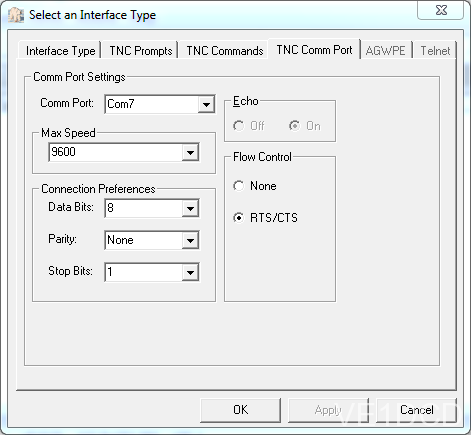
Select and Interface Type / Interface Type tap - Next, click on the TNC Comm Port tab. Here we need to select the correct Comm Port that your TNC is connected to. Generally you will always see COM1 (which is probably not the one we want). On my PC, the USB-to-Serial adapter shows a COM7, so that is the one I’ve selected. I’ve seen some PCs use COM4, COM5, or COM6 so choose the correct one for you. The rest of the settings can remain the defailt. Max Speed = 9600 baud, Data Bits = 8, Parity = None, and Stop Bits = 1.
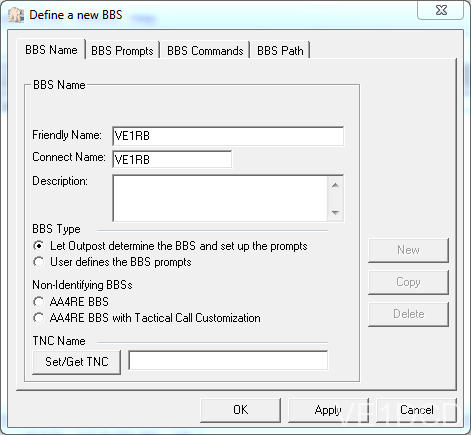
7. Now we have to configure a BBS to connect to. This is so Outpost knows where to fetch new messages from, and where to go to send messages. Click on the Setup menu again but this time select BBS. You’ll want to click the New button on the right hand side to created a new profile for this BBS (or you can edit one of the existing ones. The only real field on this tab that matters is the Connect Name filed. This needs to be populated with the name of whatever BBS you want to connect to. In my case, this is VE1RB.
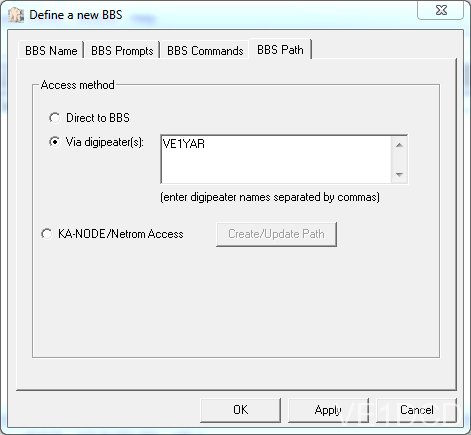
8. In my case, I also needed to configure the BBS Path as I cannot connect directly to the local BBS. All you need to define here is the list under Via digipeaters(s). In my case I can access the BBS through our club’s digipeater (VE1YAR). If you can connect directly you can skip this step.
9. Once you have clicked Apply so the settings take effect, you are ready to connect. On the main screen, click the Send/Receive button. This will tell the TNC to connect to the BBS and retrieve any messages you may have waiting for you. You will see a small pop-up window showing the output of the connection to the BBS. This is handy in case you have problems with the configuration.

10. That’s it. You should be on your way to sending and receiving messages with Outpost.
73 for now,
VE1XT
Leave a Reply